Tag Archives: notes

Creative Note-taking

If you follow me on Twitter, or on my creative instagram account (@RavynnCreates), you know that I love creating aesthetically pleasing notes. People often have questions about them, so I thought I’d create a FAQ post about my notes.

  1. Why do you make your notes like that?

Well, first, it’s super fun! I love making things. It also helps me focus, and it makes my notes easier to read and study when I have to go back to them.

2. What do you mean it helps you focus?

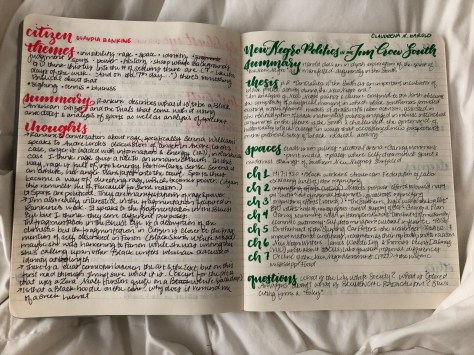
Making creative notes is almost like making a mind map. I think about the relationship of sections and words. For example, if we’re talking about the features of the “Classical Hollywood Narration,” it helps to make that heading large, and make the features smaller underneath, or close to the heading. Sometimes it helps to box things in so I know everything in that section goes together. It can also help to color code. If my heading is gold, I might use a different gold pen to number or bullet point everything that falls under that category. Sometimes I use a combination of all of these methods.

3. Do you make them during class? Like while the professor is lecturing?

Yep. Again, it helps me focus.

4. So you don’t just take quick notes and then rewrite them?

No. I do not.

5. What do you use to take notes? Pens? Notebooks?

My semester notebook is a burgundy Leuchtturm A4+ Master Slim with 121 dotted pages that I got from Jenni Bick in Dupont Circle in DC. Yes, it is personalized.

I use a variety of different pens. For headings and small brush lettering, I use Pentel Sign pens. For shadows and highlights, I use Mildliner Brush Pens. For detailing, I use Metallic Gelly Roll pens. For regular writing, my main text, I most often use a Lamy Safari fountain pen. If I’m not feeling the Lamy (or if I have run out of ink), I use Zebra Sarasa 0.7 ballpoint pens.

6. Wow, that’s really specific. Why do you use those brands?

Leuchtturm journals have thick pages that don’t ghost (show ink on the other side) and they are pre-numbered. Pentel pens are super reliable, and they come in really great, bold colors. Mildliners, I don’t use as much, but I still like them for background and contrast. Gelly Roll pens have really strong color, and they’re also reliable and relatively easy to find. I’m using a Lamy pen because I wanted a good fountain pen and I thought it might be cool to invest in a utensil that I would love to use. It’s beautiful and yellow and I do in fact love it! When my students from Keio offer me stationery gifts, they’re often Sarasa/Zebra pens and Japanese stationery is the best, so usually I’m just using the pens they gift me.

7. So do you just, like, travel with all those notebooks and pens?

Yep.

8. How many pens and notebooks do you carry with you daily?

Between 2-3 journals. I always have my semester bullet journal with me and I often have my dissertation journal. Sometimes I’ll bring my leather bound diary if I haven’t written in a while.

I honestly don’t know how many pens I have at any given time. I have at least 3 of each type of pen in different colors (except the Lamy) in my purse. I mean…probably at least two dozen.

9. Do you let people borrow your pens?

No.

10. Really?

Really. I keep a couple of regular Bic ballpoint pens in my purse to give to my students if they need a writing utensil in a pinch.

11. But how do you make such pretty pages?

Honestly, I don’t know. It’s the equivalent of doodling. My hands just kind of do their own thing. I don’t lay out my spreads prior to class, they just sort of happen. I more or less start on the top left of the page and just build from there.

12. Do you have any suggestions for folks that want to try creative notetaking?

I do! First, try not to take it so seriously; let it happen naturally. The more you try to make it pretty, the more pressure you put on yourself and then you likely won’t be satisfied with the way your notes look. Second, experiment with fonts and colors in relation to others on the page. If you have a keyword in gold script on the right in a square with writing around it, maybe try bold blue uppercase letters for your next piece. Third, practice! I’ve been making notes like this for years and it took me a while to get to a point where I could make these pages. Lastly, comparison is the thief of joy. Your notes will not look like mine. My notes will not look like yours. Embrace the uniqueness of this little way of expressing yourself!

5 Steps to Prep and Study for Comps

In a recent post, I detailed the next part of my PhD journey after finishing coursework: Comprehensive Exams, better known as Comps. The post described what Comps are, what their purpose is, and how to create lists for them. Now that I have my lists, a few people have asked me to describe how I am preparing and studying for the exams, so here’s a step-by-step guide to my process.

Step 1: Get organized.

I’m pretty sure this is the number one step for most of my how-to guides when it comes to graduate school. For some people, just having the lists is enough. I need more.

One of the first things I did was create an Excel spreadsheet that has the title and author of the text, along with some other pertinent information. What else you choose to include is up to you, but I included: whether or not I had read the material; read it but not recently; whether I had reread it; whether I owned it, needed to get it from the library, or could get it online; if I needed to Interlibrary Loan (ILL) it, or whether I wanted to buy it for my personal collection; and a separate section for notes.

Having the Excel sheet setup like this helps me see at a glance what I need to read, how I need to obtain the text and gives me an opportunity to write down any additional notes.

Step 2: Plan it!

I admittedly do not have an intricate plan for the order in which I’m reading things, at least not right now. Because I’m starting early, I’m mostly choosing things off of my lists that I wanted to read anyway for fun.

Once I’m in the thick of reading (i.e. when I’m doing nothing but comps), I will do another post about how I’ve planned out my readings. As of right now, my goal has been to read 1-3 books per week.

Step 3: Read!

IMG_3781

I try my very best not to overwhelm myself with reading, especially during the summer when I’m supposed to be relaxing. As always, I read in small chunks, either one chapter at a time for academic texts, or in intervals of 25 pages for novels and comics/graphic novels, making sure to take breaks in between each section. I spend the most time on the introduction and conclusion, making sure to highlight or underline the author’s thesis, the goals of the text, the evidence they will use and their methodology. I try to spend no more than 30 minutes per chapter, unless the chapter is particularly pertinent to my own research interests.

For novels and graphic novels, I try to simply enjoy reading them, because it was, after all, my love of them that got me into graduate school in the first place.

Step 4: Take notes

IMG_5317.jpg

In addition to the Excel sheet, I also keep a physical journal where I take notes on the texts that I am reading. My process for note taking varies by the type of text I am engaging with but here are the key subjects I hit during my note taking:

  • For novels and short stories, I read the entire text, highlight and underline key passages to my heart’s content. Once I’m done, I provide a brief summary, pull out themes and motifs from the text, note fast facts like the date published and etc, write down main characters and then my thoughts and questions. I like to use the “thoughts” section to synthesize and make connections between the current text and any others that I have read. For example, when reading The Bluest Eye, I used this section to make connections between Maureen, Pecola and tragic mulatto narratives that I read in my Interracialism class.
  • For comics and graphic novels, I like to note keywords, themes, and visual and/or verbal motifs. I have a “thoughts and questions” section for things that troubled me during my reading, as well as things to bring up during Comps meetings with my faculty members.
  • For academic texts/non-fiction, I cite the main argument, the goals of the text, evidence used, and methodology with a brief descriptive summary of the text. If I can discern it, I like to note the scholarly lineage of the text, which is to say which other scholars is the text in conversation with, and from where does it draw its secondary sources. I also have a section to discuss ways in which the text may be of service to my own scholarly work. (Where does my scholarship fit?)

Step 5: Decompress!

Be sure to give yourself time in between texts to take care of yourself. Reach out to your friends, go to the gym, eat a good meal. You will spend a lot of time with just you and your thoughts, but don’t let it consume you.


So there you have it: a step-by-step guide to preparing and studying for Comps. As the year progresses, I’ll have even more detailed guides to prepping for the big exams, but this is how I’ve been doing it thus far. I hope at least some of this was helpful to you. Happy reading!

Week 13, or Finals (Prep) Season

Normally during breaks, I write reflection pieces for BGDGS. This time around, I essentially worked straight through Thanksgiving Break, and while that’s not the healthiest thing I’ve ever done, it did give me some time to reflect on how I prep for final projects and seminar papers.

STEP ONE: Work up some ideas

My first step involves a lot of brain dumping. During November classes, I spend a lot of time turning ideas over in my head, trying to catch on to the ends of ideas brought up in class that peak my interest. As the semester progresses, you can find me jotting ideas for papers down in the margins of my journals or on post it notes.

STEP TWO: Follow an idea down the rabbit hole.

After I’ve collected enough of these half thoughts, I choose the idea that has the most substance to it. This process generally is dictated by how many questions I can ask related to the topic. Once a topic is selected, I do bigger brain dumps.

image
Mind map and outline
image
Up close mind map
image
Outline

Above, you can see examples of two of my brain dumps. In the left most picture, the pink paper on top is a mind map– something I honestly haven’t done since I was in middle school but considering I’m working on a Scalar project for my Media class instead of a linear paper, I decided I needed to work through my ideas in a more associative way. The paper on the right in that picture is a traditional outline for my Reflections of the African Diaspora class. Linear papers get linear planning.


Then, you can see a closer view of my mind map and finally on the bottom all I’ve done is consolidate my ideas into a outline, broken into workable chunks.

STEP THREE: Secure, Read, and Annotate Some Books

My heavily annotated World of Wakanda Volume 1


Now is also about the time when I start gathering books for my final projects. I spend a lot of time in the Library database, requesting ILLs, pulling books from the library and my own personal stock of monographs and comics. Once the haul is over, I grab a pile of sticky notes, highlighters and pencils, and go to town with annotating those bad boys.

I typically color code everything– in my World of Wakanda volume, green indicates spatial references, orange identity formation, and blue technology. In books that will be used for more than one paper, I assign each class a color.


STEP FOUR: Start writing!

A blank scalar page

This blank Scalar page is about as far as I’ve gotten on actually writing anything. I have a blank word document for my Reflections paper, and just a few meager ideas for my Feminism essay. But fortunately, this is a light semester in terms of finals. Both my Reflections and Feminism papers are 15 pages, and my Scalar project should be about 2,500 words, which is about 10-12 pages. Compared to my first semester when I was writing between 60-70 pages total, this is going to be so manageable.

The Scalar project is just going to take time. I need to work on it a little every day to get used to working in the form so I’m not panicking and trying to do everything at last minute. My current plan is to write out all of my sections in a document first, then copy and paste the sections into Scalar, then work from there. I also want to try annotating videos and images in the site itself, so that’s going to take time as well. I’m going to work hard on this one because my friend and I are considering submitting these to a comics conference happening in August, if all goes well.

STEP 5: Think ahead!

As I’ve gotten further along in grad school, I’ve learned to think of final papers, not really as final papers, but as drafts, as playgrounds for ideas you can come back to, expand on, or turn into something different, like a conference paper or a dissertation chapter. Thinking about papers as intellectual exercises rather than scary, huge monstrosities helps take the edge off of finals season and puts you back in control.

I don’t have much written yet, but I do have a lot of prep work done. The more prep you do, the easier finals season becomes. Hopefully next time, I’ll have more to reflect on, but in the meantime, good luck to everyone out there who, like me, is struggling through Finals Season.

Happy Writing!